Publishing a Node.js Express App to Windows Azure
Windows Azure has really come on in the past few months. With the new management dashboard, support for other web technologies (even horrible ones like PHP) and removal of Silverlight, it’s actually become a pleasure to use.
One of the new supported technologies is Node.js. I’ll not go into the reasons for using Node again as, if you’re here, you probably already know enough to know you’d want to use it.
So, getting it set up on Azure.
Setting up your environment
Grab the Windows Azure SDK for Node.js and install it. This will give you all of the components you’ll need:
- Node.js
- Windows Azure PowerShell
- IISNode
- NPM for Windows
- Windows Azure Compute & Storage Emulators
Creating a new Node application
For Azure compatibility, the Powershell plugin creates a wrapper around the Node app with various config files. It’s easier to see once it’s set up. So, open up your new Windows Azure PowerShell app. To make sure you have access to everything the app can do, make sure to Run as Administrator.
You’ll need somewhere to store your files locally, so CD into a directory. I’m just using c:\node\.
cd c:nodeCreate the app
The Node Powershell wrapper includes various cmdlets to set things up. We’ll use one of these to create our app structure.
New-AzureService myexpressappHere, myexpressapp is the name of my app. You can call it whatever you want.
If all’s working as it should, you should get a confirmation message:
Service has been created at C:\\node\myexpressappExamine the structure
Type the command ls to bring up a list of the files that have been created for you:
PS C:\\node\myexpressapp> ls


    Directory: C:\\node\myexpressapp


Mode                LastWriteTime     Length Name
----                -------------     ------ ----
-a---        14/07/2012     11:20         67 deploymentSettings.json
-a---        14/07/2012     11:20        281 ServiceConfiguration.Cloud.cscfg
-a---        14/07/2012     11:20        281 ServiceConfiguration.Local.cscfg
-a--- 14/07/2012 11:20 241 ServiceDefinition.csdef- deploymentSettings.json is used by the Azure PowerShell cmdlets to store local settings.
- ServiceConfiguration.Cloud.cscfg, ServiceConfiguration.Local.cscfg and ServiceDefinition.csdef are Azure-specific files necessary for publishing your app. You can read more info about these at Overview of Creating a Hosted Service for Windows Azure on MSDN.
Create a web role
Now you have the wrapper for your app, you need to create a new web role to host the node application itself.
In Azure, roles define components that can run in the execution environment. A web role is customized for web application programming. You can create a new web role for your application using:
Add-AzureNodeWebRole wwwAgain, you can call the web role anything you want; I’m just using www as it makes sense to me. If you don’t specify a name, the cmdlet will default to calling it WebRole1.
You should get a confirmation message something like the following:
Role has been created at C:/node/myexpressapp/www. For easy access to Windows Azure services from your application code, install the Windows Azure client library for Node.js by running ‘npm install azure’.If you want to use any Azure services, you can install them using NPM as instructed. We don’t need them for the purpose of this example, so I’m not going to bother doing that just now.
Under the new www directory, you now have the following:
- bin
- iisnode.msi
- node.exe
- setup_web.cmd
- vcredist_x64.exe
- server.js
- Web.cloud.config
- Web.config
The bin folder contains the files that Azure needs to host the node app with IIS.
The two web.config files contain (shockingly) config settings for the app in both local/emulated and cloud environments.
The server.js file is the Node application itself. It’s a very basic app just to get you started, containing only this:
var http = require('http');
var port = process.env.port || 1337;
http
  .createServer(function (req, res) {
    res.writeHead(200, { 'Content-Type': 'text/plain' });
    res.end('Hello Worldn');
  })
  .listen(port);
The only line to take particular notice of is line 2. This switch will look for a port number provided by the Azure host and use that if available, defaulting to the specified value (1337) if not.
First run
To make sure that the environment is set up correctly and working, you can launch the app from Azure.
The Windows Azure SDK comes with an Azure compute emulator, allowing you to test your application locally. The compute emulator simulates the environment your application will run in when it is deployed to the cloud. So, you can test your application without having to actually deploy it.
Start and launch the emulator using this command:
Start-AzureEmulator -launchAzure will build your app, create a local package and launch your default browser with your app. You should get this:
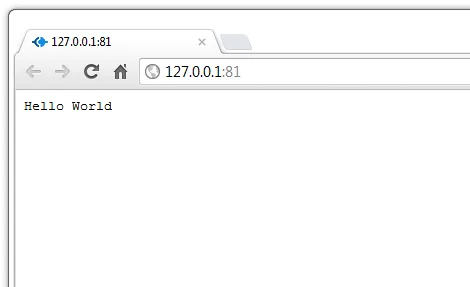
Not the most exciting website but consider this: it’s a Node.js application running from IIS within an emulated Azure server. That’s better, huh?
Switching to Express
Now we know everything’s working, it’s time to switch to Express. The Express framework is a Sinatra based development framework for Node with support for routing, LESS, session control and a host of other useful stuff.
Getting it set up is pretty easy. If you want a full run-down of what’s going on, you can find more info here, but the commands you’ll need are:
CD into your web role (www in my case):
cd wwwInstall Express:
npm install expressCreate a new Express app (you’ll get a warning that the directory isn’t empty; just type y and hit return):
expressInstall the Express prerequisites:
npm installYour output will depend on what the latest versions of Express are, but you’ll get something like this:
PS C:\\node\myexpressapp> cd www
PS C:\\node\myexpressapp\www> npm install express
npm http GET https://registry.npmjs.org/express
npm http 304 https://registry.npmjs.org/express
npm http GET https://registry.npmjs.org/range-parser/0.0.4
npm http GET https://registry.npmjs.org/mkdirp/0.3.3
npm http GET https://registry.npmjs.org/send/0.0.2
npm http GET https://registry.npmjs.org/fresh/0.1.0
npm http GET https://registry.npmjs.org/response-send/0.0.1
npm http GET https://registry.npmjs.org/commander/0.6.1
npm http GET https://registry.npmjs.org/methods/0.0.1
npm http GET https://registry.npmjs.org/debug
npm http GET https://registry.npmjs.org/cookie/0.0.3
npm http GET https://registry.npmjs.org/connect/2.3.8
npm http 304 https://registry.npmjs.org/range-parser/0.0.4
npm http 304 https://registry.npmjs.org/mkdirp/0.3.3
npm http 304 https://registry.npmjs.org/send/0.0.2
npm http 304 https://registry.npmjs.org/fresh/0.1.0
npm http 304 https://registry.npmjs.org/commander/0.6.1
npm http 304 https://registry.npmjs.org/response-send/0.0.1
npm http 304 https://registry.npmjs.org/methods/0.0.1
npm http 304 https://registry.npmjs.org/debug
npm http 304 https://registry.npmjs.org/cookie/0.0.3
npm http 304 https://registry.npmjs.org/connect/2.3.8
npm http GET https://registry.npmjs.org/mime/1.2.6
npm http GET https://registry.npmjs.org/crc/0.2.0
npm http GET https://registry.npmjs.org/cookie/0.0.4
npm http GET https://registry.npmjs.org/qs/0.4.2
npm http GET https://registry.npmjs.org/bytes/0.1.0
npm http GET https://registry.npmjs.org/formidable/1.0.11
npm http 304 https://registry.npmjs.org/mime/1.2.6
npm http 304 https://registry.npmjs.org/formidable/1.0.11
npm http 304 https://registry.npmjs.org/crc/0.2.0
npm http 304 https://registry.npmjs.org/qs/0.4.2
npm http 304 https://registry.npmjs.org/cookie/0.0.4
npm http 304 https://registry.npmjs.org/bytes/0.1.0
express@3.0.0beta6 ./node_modules/express
├── methods@0.0.1
├── range-parser@0.0.4
├── fresh@0.1.0
├── commander@0.6.1
├── cookie@0.0.3
├── debug@0.7.0
├── mkdirp@0.3.3
├── send@0.0.2 (mime@1.2.6)
├── response-send@0.0.1 (crc@0.2.0)
└── connect@2.3.8 (bytes@0.1.0, crc@0.2.0, cookie@0.0.4, qs@0.4.2, formidable@1.0.11)
PS C:\\node\myexpressapp\www> express
destination is not empty, continue? y
create : .
create : ./package.json
create : ./app.js
create : ./public
create : ./routes
create : ./routes/index.js
create : ./public/javascripts
create : ./public/stylesheets
create : ./public/stylesheets/style.css
create : ./public/images
create : ./views
create : ./views/layout.jade
create : ./views/index.jade
dont forget to install dependencies:
$ cd . && npm install
PS C:\\node\myexpressapp\www> npm install
npm http GET https://registry.npmjs.org/express/2.5.8
npm http GET https://registry.npmjs.org/jade
npm http 304 https://registry.npmjs.org/jade
npm http 304 https://registry.npmjs.org/express/2.5.8
npm http GET https://registry.npmjs.org/mkdirp/0.3.0
npm http GET https://registry.npmjs.org/commander/0.6.1
npm http GET https://registry.npmjs.org/qs
npm http GET https://registry.npmjs.org/mime/1.2.4
npm http GET https://registry.npmjs.org/connect
npm http 304 https://registry.npmjs.org/commander/0.6.1
npm http 304 https://registry.npmjs.org/mkdirp/0.3.0
npm http 304 https://registry.npmjs.org/qs
npm http 304 https://registry.npmjs.org/connect
npm http 304 https://registry.npmjs.org/mime/1.2.4
npm http GET https://registry.npmjs.org/formidable
npm http 304 https://registry.npmjs.org/formidable
jade@0.26.3 ./node_modules/jade
├── commander@0.6.1
└── mkdirp@0.3.0
express@2.5.8 ./node_modules/express
├── mime@1.2.4
├── qs@0.4.2
├── mkdirp@0.3.0
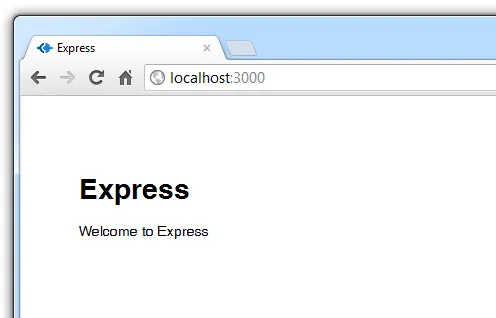
└── connect@1.9.2 (formidable@1.0.11)Now’s a good time to test your Express app. It’s not yet set up to run through the emulator, so we’ll have to run it manually.
Run the following command:
node appNow you should be able to go to localhost:3000 on your local machine and see the default Express app:
Switching Azure to use the new Express app
To get Azure to run the new application, you need to make a couple of minor changes.
Express creates the main Node application in the app.js file. Open this in a text editor and look near the bottom. You should see something like this:
app.listen(3000, function () {
  console.log(
    'Express server listening on port %d in %s mode',
    app.address().port,
    app.settings.env,
  );
});
We need to get the app set up to use the port value from Azure, so we’ll use the same variable as from the basic app Azure created. Change those lines in app.js to look like this:
var port = process.env.port || 1337;
app.listen(port, function () {
  console.log(
    'Express server listening on port %d in %s mode',
    app.address().port,
    app.settings.env,
  );
});
Now that’s done, you can delete the server.js file as we won’t be using it anymore.
The two web config files contain information for Azure about how to run the app. If you open up web.config, it’ll look something like this:
<?xml version="1.0" encoding="utf-8"?>
<!--
  For more information on how to configure your ASP.NET application, please visit
  http://go.microsoft.com/fwlink/?LinkId=169433
  -->
<configuration>
  <appSettings>
    <add key="EMULATED" value="true" />
  </appSettings>
  <system.webServer>
    <modules runAllManagedModulesForAllRequests="false" />

    <!-- indicates that the server.js file is a node.js application
    to be handled by the iisnode module -->
    <handlers>
      <add name="iisnode" path="server.js" verb="*" modules="iisnode" />
    </handlers>
    <rewrite>
      <rules>
        <clear />
        <rule name="app" enabled="true" patternSyntax="ECMAScript" stopProcessing="true">
            <match url="server.js.+" negate="true" />
            <conditions logicalGrouping="MatchAll" trackAllCaptures="false" />
            <action type="Rewrite" url="server.js" />
        </rule>
      </rules>
    </rewrite>
  </system.webServer>
</configuration>
If you have a look at lines 18, 24 and 26, you’ll see references to the old server.js file. Since our app now runs from app.js, these need to be updated. So, your new file will look like:
<?xml version="1.0" encoding="utf-8"?>
<!--
For more information on how to configure your ASP.NET application, please visit
http://go.microsoft.com/fwlink/?LinkId=169433
-->
<configuration>
<appSettings>
<add key="EMULATED" value="true" />
</appSettings>
<system.webServer>
<modules runAllManagedModulesForAllRequests="false" />
<!-- indicates that the app.js file is a node.js application
to be handled by the iisnode module -->
<handlers>
<add name="iisnode" path="app.js" verb="*" modules="iisnode" />
</handlers>
<rewrite>
<rules>
<clear />
<rule name="app" enabled="true" patternSyntax="ECMAScript" stopProcessing="true">
<match url="app.js.+" negate="true" />
<conditions logicalGrouping="MatchAll" trackAllCaptures="false" />
<action type="Rewrite" url="app.js" />
</rule>
</rules>
</rewrite>
</system.webServer>
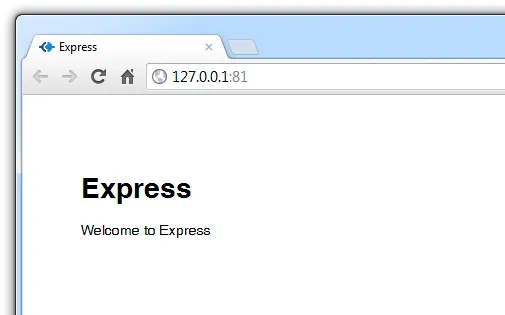
</configuration>I’ve also updated the comment on line 15 just to be pedantic.
One of the cool things about the Azure emulator is that it’ll automatically recompile the application when anything has changed. So, you can go to 127.0.0.1:81 on your browser straight away and see your Express app:
Putting the app in the cloud
Before you can put anything onto Azure, you’re going to need an account. The good news is that you can get a 90 day free trial at the moment. So, go sign up there.
Set up node for deployment
Once you have your account set-up, you’ll need to create deployment settings for your app. This is also done using Node Powershell. Run the following command:
Get-AzurePublishSettingsThis will pop up your browser with a download for your settings file and some information about it. It’ll look like this:
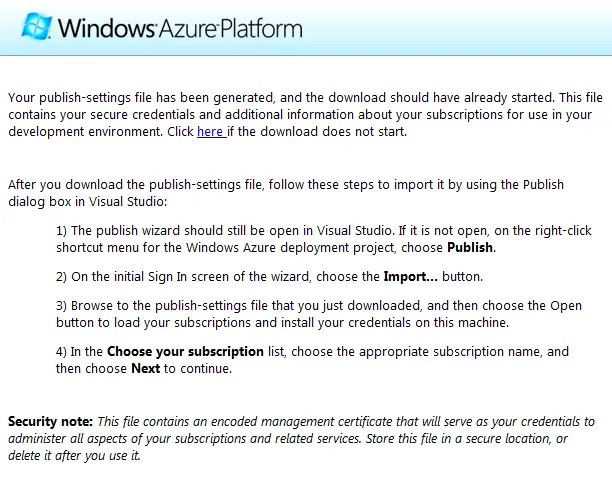
Save your settings file to somewhere you can easily find again. I’ve saved mine to c:\node\deploysettings\myexpressapp.publishsettings.
Back in Node Powershell, run the following cmdlet to import your downloaded app settings into Azure:
Import-AzurePublishSettings c:\\node\deploysettings\myexpressapp.publishsettingsAs suggested by the Azure web page, you should now delete the .publishsettings file.
Publishing
Now it’s time to publish your app. To do this, we’ll use the Publish-AzureServiceProject cmdlet.
Before you can run it, you need to come up with a unique name for your app (as this name will be used as the URL subdomain) and decide where you want to geographically host it.
Your options for hosting locations are:
- North Central US
- Anywhere US
- Anywhere Asia
- Anywhere Europe
- North Europe
- South Central US
- Southeast Asia
Since I’m there, I’m going to go for North Europe.
And, since I’m pretty sure it’s going to be unique, I’ll go for kwtestnodeappazure as a name. I’ve run into problems when using dashes within names so it’s best to keep names A-Za-z0-9.
The next thing you have to do is update your web.cloud.config file in the same way that we edited the web.config file earlier (we replaced server.js with app.js). The new file should look like:
<?xml version="1.0" encoding="utf-8"?>
<!--
  For more information on how to configure your ASP.NET application, please visit
  http://go.microsoft.com/fwlink/?LinkId=169433
  -->
<configuration>
  <system.webServer>
    <modules runAllManagedModulesForAllRequests="false" />

    <!-- NOTE: By default, debugging and logging are unsecure and should not be enabled for production applications in the cloud.-->
    <iisnode
      debuggingEnabled="false"
      loggingEnabled="false"
      devErrorsEnabled="false"
    />

    <!-- indicates that the app.js file is a node.js application
    to be handled by the iisnode module -->
    <handlers>
      <add name="iisnode" path="app.js" verb="*" modules="iisnode" />
    </handlers>
    <rewrite>
      <rules>
        <clear />
        <rule name="app" enabled="true" patternSyntax="ECMAScript" stopProcessing="true">
            <match url="app.js.+" negate="true" />
            <conditions logicalGrouping="MatchAll" trackAllCaptures="false" />
            <action type="Rewrite" url="app.js" />
        </rule>
      </rules>
    </rewrite>
  </system.webServer>
</configuration>
So, let’s run the cmdlet:
Publish-AzureService -Name kwtestnodeappazure -Location "North Europe"Powershell should now start to deploy your app. It’ll tell you it “may take several minutes” and this is right. It does tend to take a fair amount of time to configure and upload.
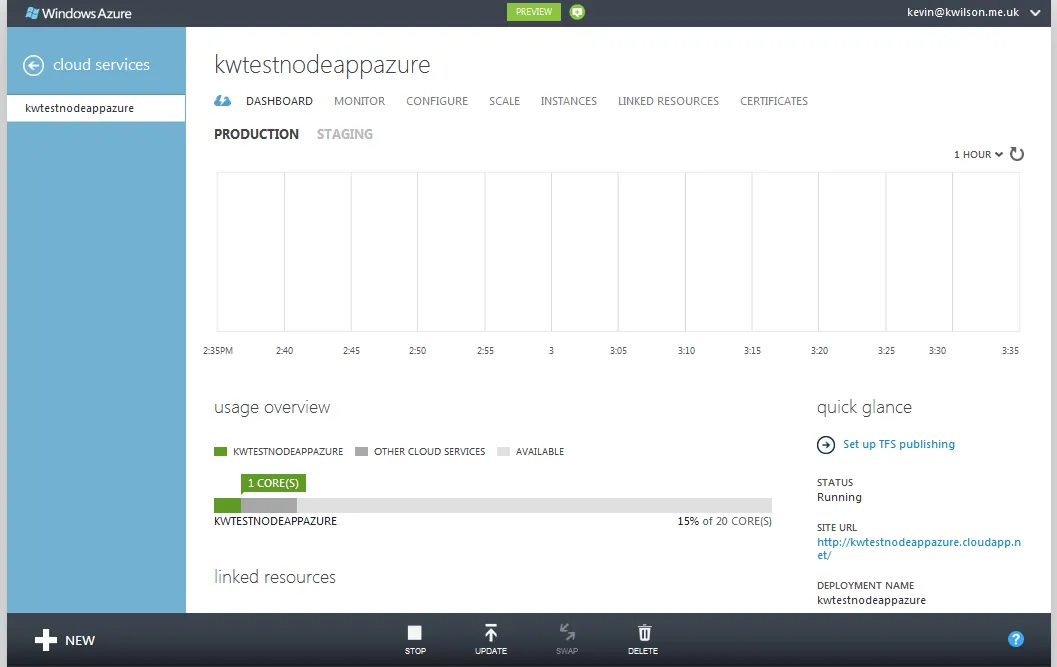
In the meantime, you can jump on to your Azure Dashboard and watch it update as your app makes its way up to the Cloud.
What the cmdlet is doing is:
- Create a deployment package for the app.
- Create a new storage account if one doesn’t already exist.
- Create a new hosted service if one doesn’t already exist. This is the container in which the application is hosted within Azure.
- Publish the deployment package to Azure.
When it’s finished (told you it’d take a while), the output should be similar to this:
PS C:\\node\myexpressapp\www> Publish-AzureService -Name kwtestnodeappazure -Location "North Europe"
Publishing to Windows Azure. This may take several minutes...
15:24:13 - Preparing deployment for kwtestnodeappazure with Subscription ID: notmyact-ualw-indo-wsaz-ureuniqueid...
15:24:21 - Connecting...
15:24:23 - Creating...
15:24:25 - Created hosted service 'kwtestnodeappazure'.
15:24:25 - Verifying storage account 'kwtestnodeappazure'...
15:26:29 - Uploading Package...
15:31:31 - Created Deployment ID: 30d4dd451c6b4692ac6f5a1d4785b73f.
15:31:31 - Starting...
15:31:31 - Initializing...
15:31:51 - Instance www_IN_0 of role www is creating the virtual machine.
15:35:58 - Instance www_IN_0 of role www is busy.
15:37:03 - Instance www_IN_0 of role www is ready.
15:37:04 - Created Website URL: http://kwtestnodeappazure.cloudapp.net.
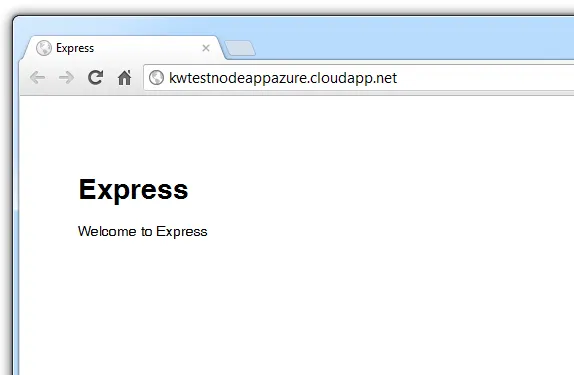
15:37:04 - Complete.Now it’s complete, you can visit the live URL and see the app in all its glory:
If you make any changes to your local app, all you need to do to redeploy is call Publish-AzureService from Powershell and your changes will replace your live version.
So, there you go: Express on Node on ISS on Azure. Easy.