Create a Windows 8 Dual Boot on a Windows 7 Machine
I’ve been really impressed with what I’ve seen of Windows 8. I seem to be in the minority but the tile layout, type to search and (almost) instant-on seem like a huge step forward to me. Also, the ability to create desktop apps using HTML5 and JavaScript is set to open up app development to a huge number of developers.
All good.
Unfortunately, our company IT department are looking like they’re going to give it the Vista treatment and skip it altogether. So, I need to install it myself to sit alongside my existing Windows 7 installation.
Get Windows 8
Windows 8 is currently £24.99 from Microsoft and can be gotten for £14.99 if you bought a Windows 7 PC in the past few months (or if you feel like testing whether they check up on these things in the future). I decided that the time taken to research and attempt to fake having bought a Win7 PC recently wasn’t worth the £10 saving, so just went for the full price.
You can go and buy and download Windows 8 Pro from here. The first step is to download and run the Windows8-UpgradeAssistant.exe utility that will scan your system and all of your installed apps to check for compatibility with Windows 8.
I already know my system will run it and I don’t care about my currently installed Windows 7 apps so this is a bit of a waste of time for me. Luckily, it’s a quick process. Oh, no, wait: it’s not. And it can’t be skipped. It took around half an hour to tell me that my system was fine but a few of my apps weren’t compatible. I don’t care.
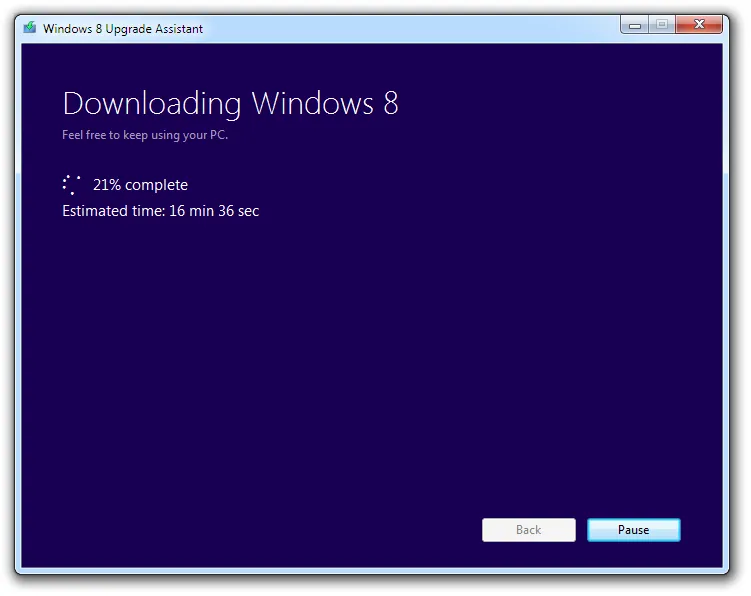
Once you’ve endured that step, you can proceed through the payment process and your 2Gb Windows 8 download will start. I’ve got a pretty fast connection but this still took a chunk of time.
The estimated time remaining seems to come from the same algorithm as the Windows copy file dialog.
While it’s downloading, you can go set up your VHD.
VHD
Booting from a Virtual Hard Disk (VHD) is a great option for a dual boot since you don’t need to repartition anything and your VHD-installed operating system is going to run on your actual hardware: no mucking around with software virtualised stuff here.
Danger, Will Robinson
Remember that you're not reading this on Microsoft’s official site. This is just *some guy’s blog*. This works on my machine. *It might destroy yours.* I take no responsibility for you losing your sure-to-be-a-best-selling novel or pictures of Nessie you have on your machine.
Still here? Okay, let’s create your disk.
Find a Space
When you create a new VHD, you need to allocate an amount of space for it to expand into. It’ll only ever use as much as it needs, so you’ll not have a ton of wasted space, but it’s worth giving it a bit of room. You need somewhere on your system for the image to live where it can expand.
It’s not a necessity, but I also try and keep the path for it space-free so I don’t have to muck around with escape characters when I’m typing in paths. When I select a disk to reformat, I don’t want bad things to happen because I missed a backslash.
Anyway, I set up a storage location of d:\VirtualDisks\ and decided on 80Gb for storage since I’m planning to install Visual Studio and a few other tools on it.
Create a VHD
You can create a VHD using the disk management GUI, but we’ll be using the command line when we finally install Windows so might as well get used to it now.
Start a command prompt as Administrator and fire up DISKPART:
C:\Users\kwilson>diskpart

Microsoft DiskPart version 6.1.7601
Copyright (C) 1999-2008 Microsoft Corporation.
On computer: NGL020107
Now create your disk (remember my disk size is 80Gb):
DISKPART> create vdisk file=d:VirtualDisksWin8.vhd type=expandable maximum=80000

  100 percent completed

DiskPart successfully created the virtual disk file.
We now need a partition on the disk, so we’ll need to select it, attach it, then create the partition:
DISKPART> select vdisk file=d:VirtualDisksWin8.vhd

DiskPart successfully selected the virtual disk file.

DISKPART> attach vdisk

  100 percent completed

DiskPart successfully attached the virtual disk file.

DISKPART> create partition primary

DiskPart succeeded in creating the specified partition.
Now we have a VHD ready for Windows 8.
Creating your install media
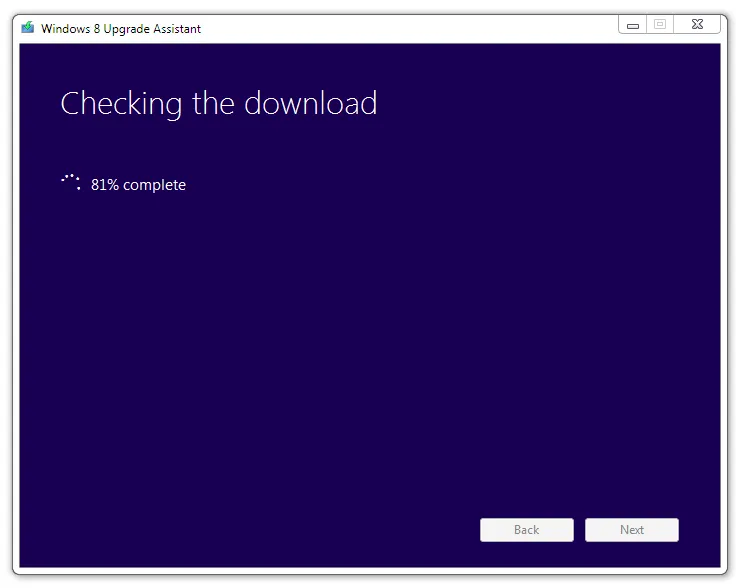
Back to your Windows 8 download. Once done, it’ll run through a disk check.
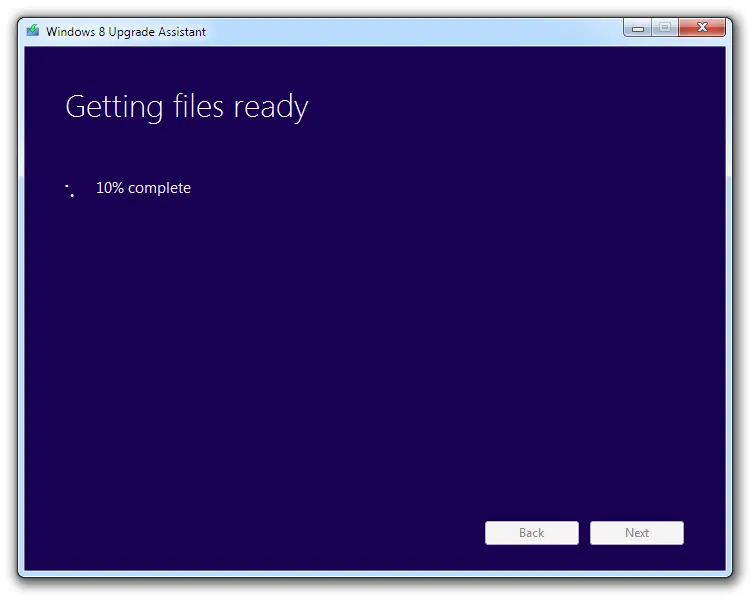
Then it’ll get files ready. This takes a few minutes. Go make another coffee.
Once done, you’ll be given some options for installation.
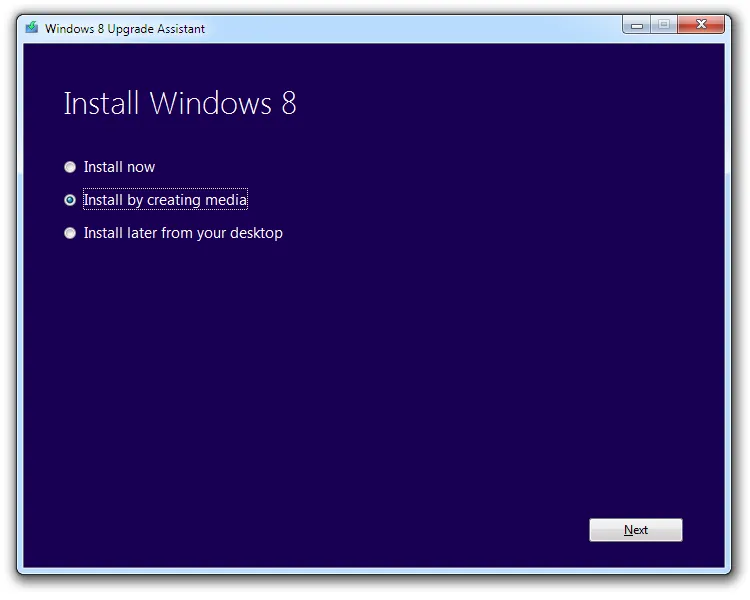
Since we want to do a clean stall on a new (virtual) disk, we’ll create an ISO. So pick ‘Install by creating media’. Then choose ISO:
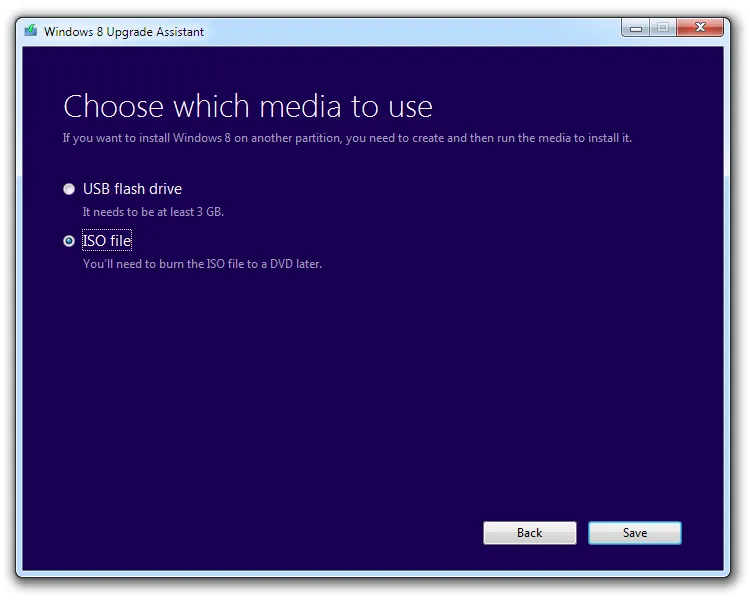
You can choose to create a bootable USB drive here instead but my flash drive bit the dust a couple of weeks ago so I’m going old-school with a DVD.
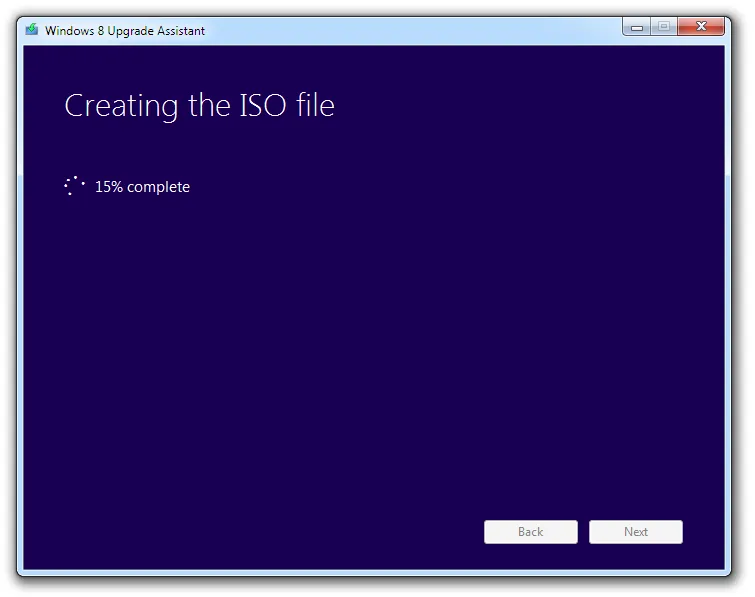
The installer will then ask you where you want to save your ISO and then will spend a while building it.
In the meantime, go find a blank DVD to burn to. When it finishes, it’ll give you a summary with your product key.
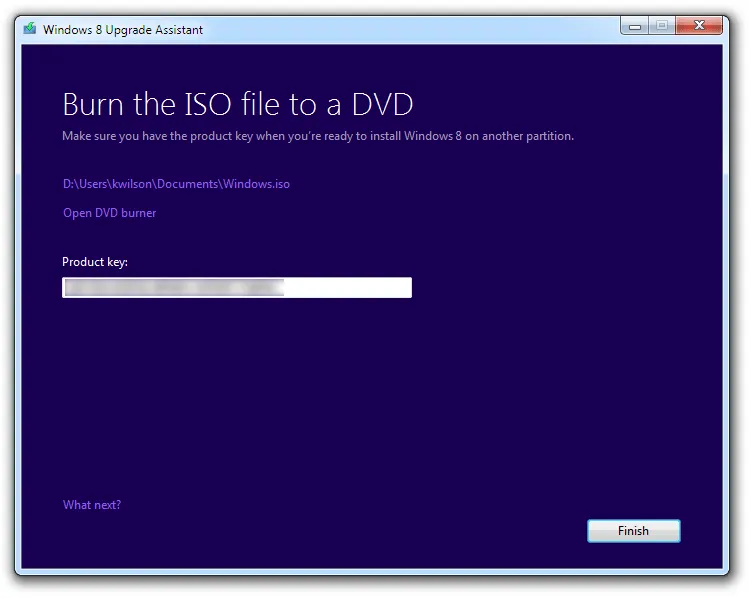
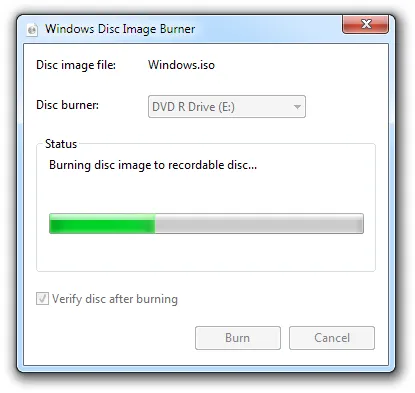
Find your downloaded ISO on disk, right click it and select Open With Windows Disc Image Burner. Insert your blank DVD, click start and your image will be written to disc.
Install Windows 8
Now you have your install DVD, it’s (finally) time to get Windows 8 on your machine. Reboot with the DVD in the drive and choose to boot from it. You can usually get into boot options by hitting F12 or similar as the machine starts up.
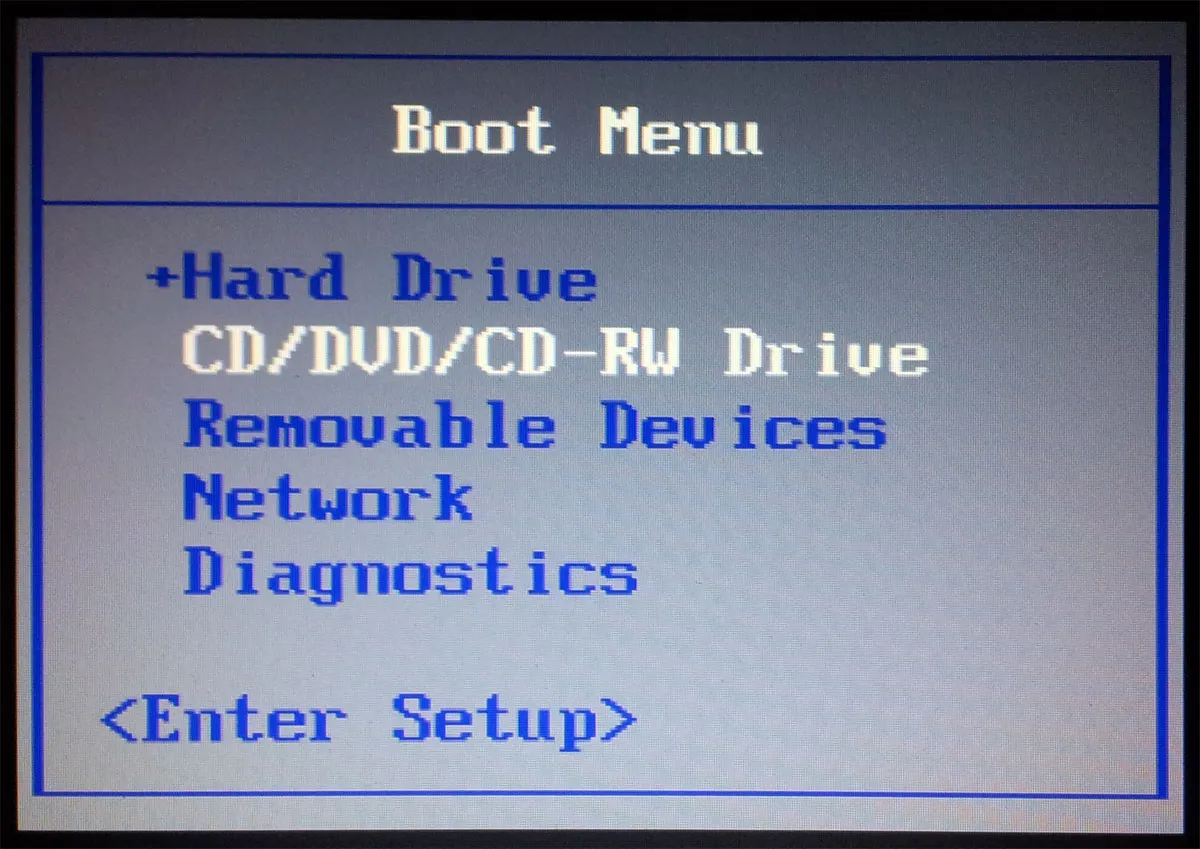
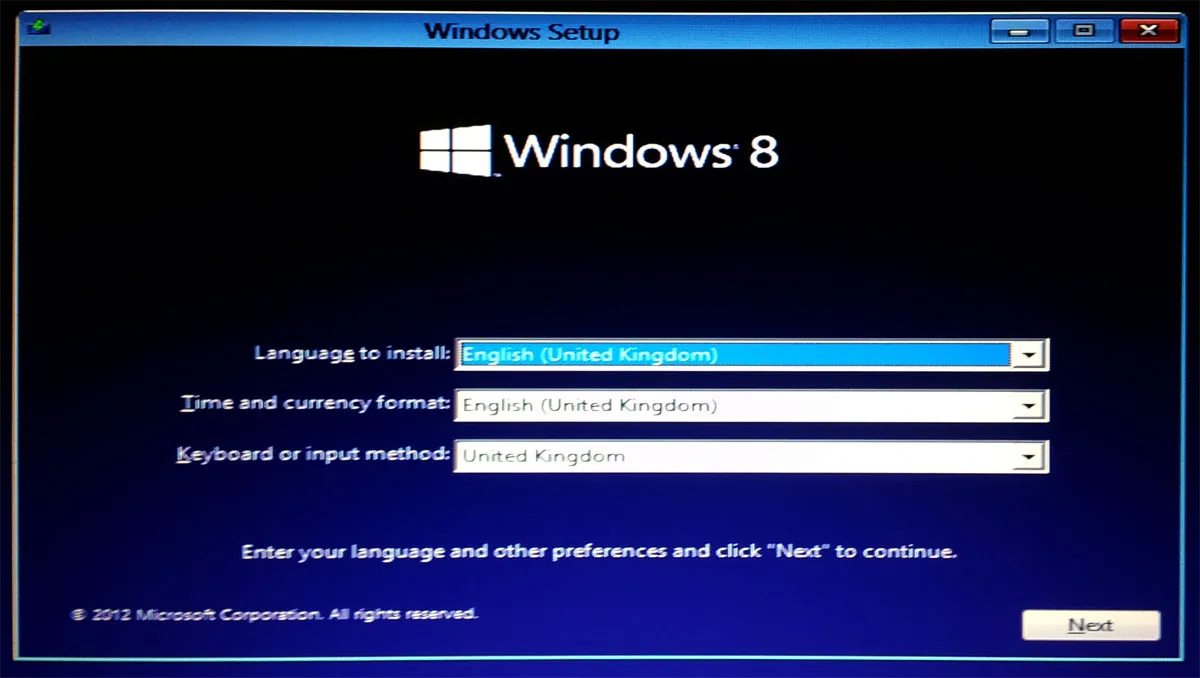
If the correct start-up device has been selected, the machine will boot into the Windows 8 installation program. Choose your region:
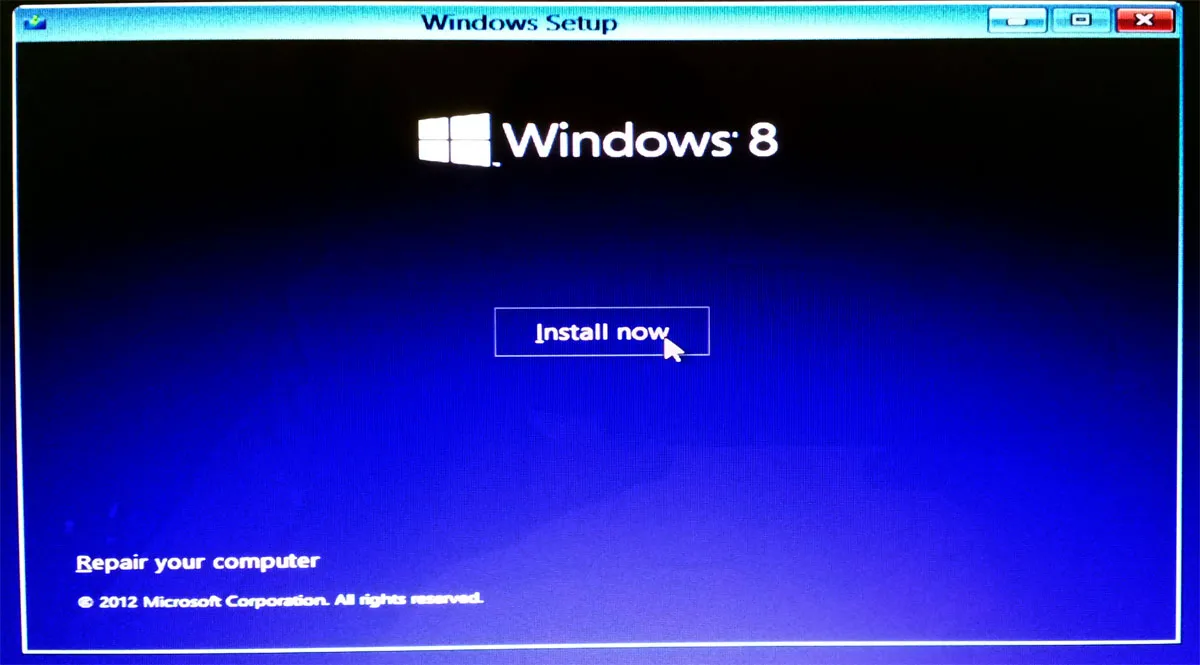
Choose to install Windows…
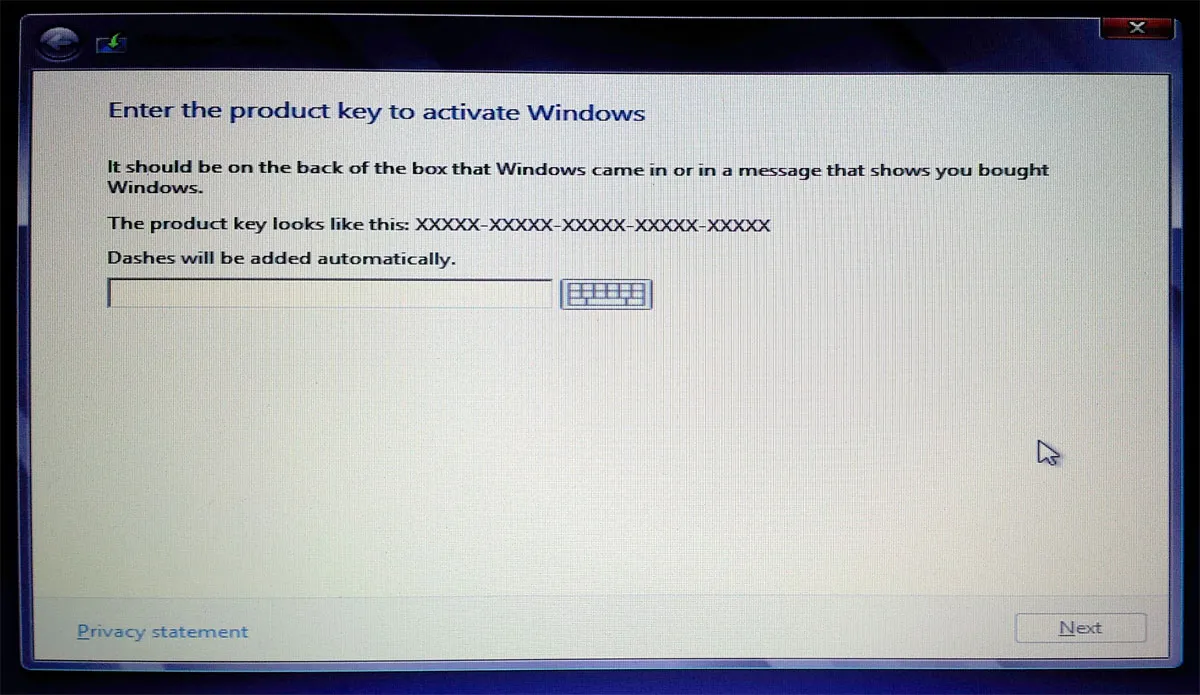
… enter your product key…
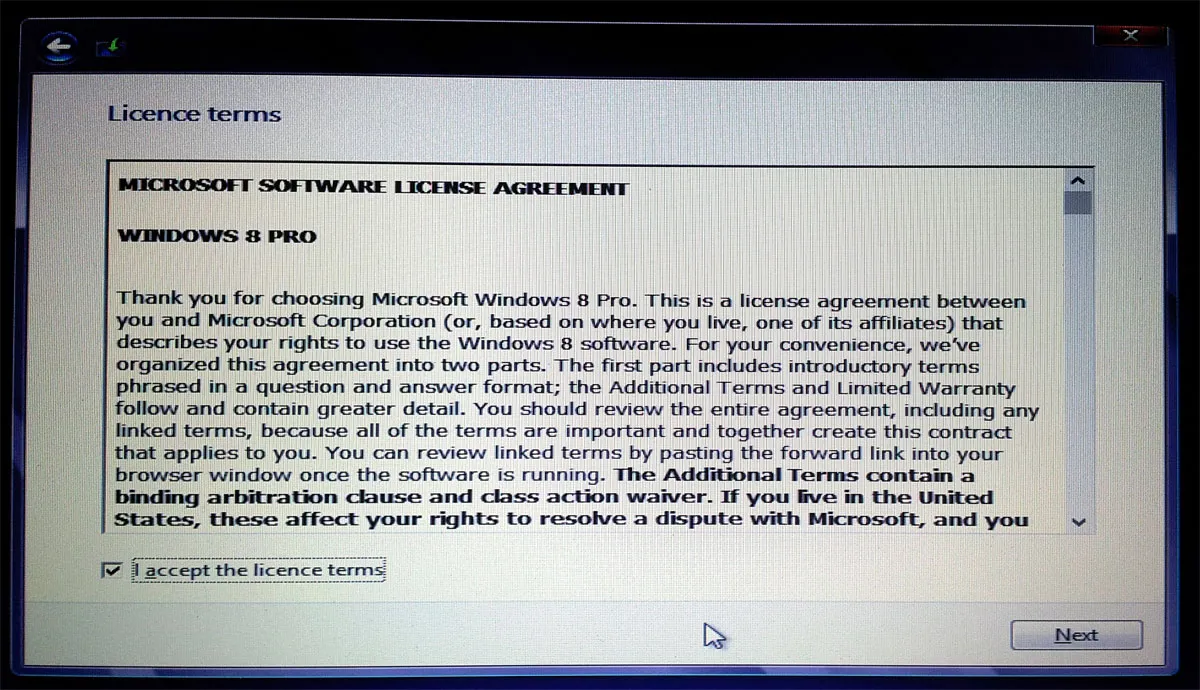
… read and accept the pages and pages of terms & conditions (or just click accept)…
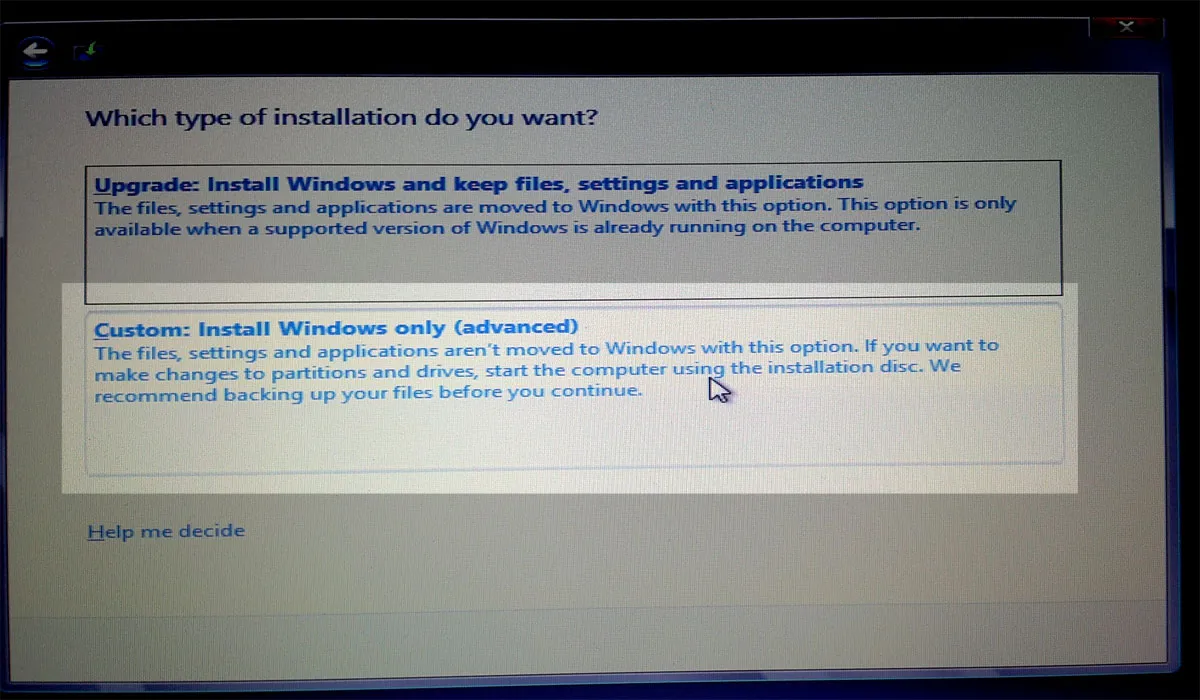
That’ll take you to the installation options. We’re doing a clean install, so we want to choose the custom installation option:
Next, the installer will ask you where you want to install Windows and you’ll get a list of the physical partitions on your system. Stop here; read this bit carefully before selecting anything.
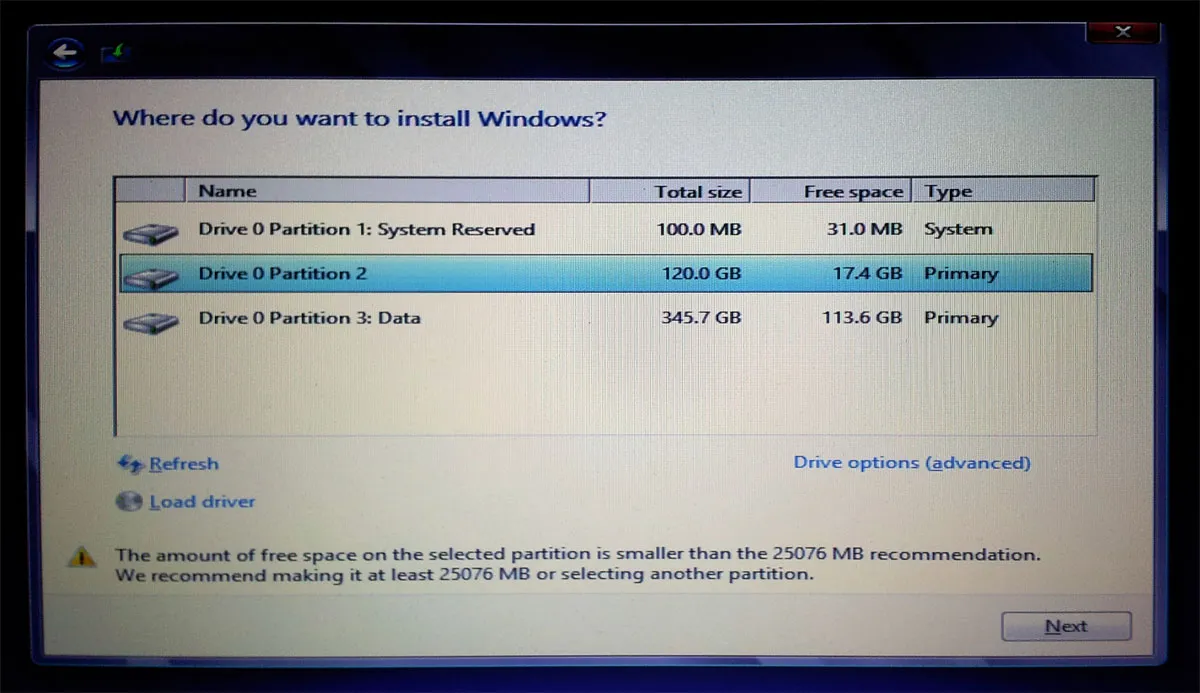
Your VHD isn’t included here so we’ll need to attach that.
Attaching a VHD
Hit Shift + F10 to bring up a command terminal.
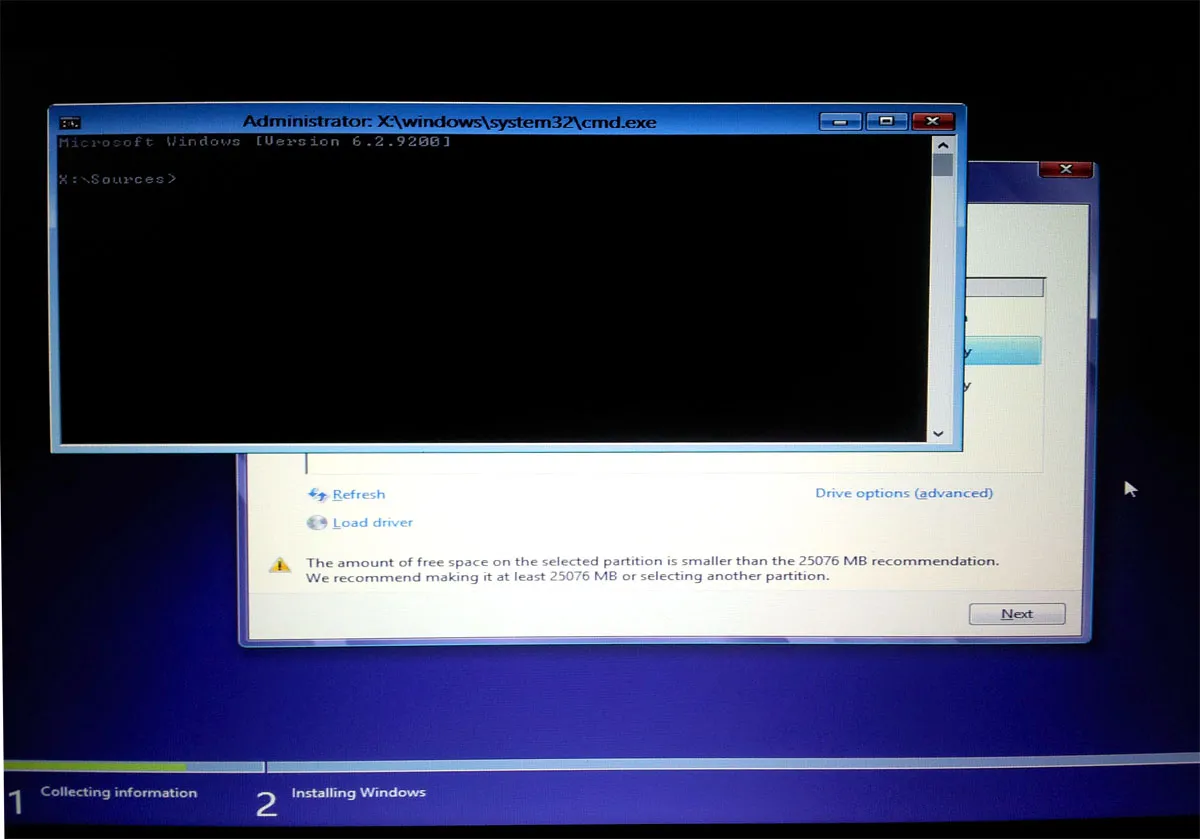
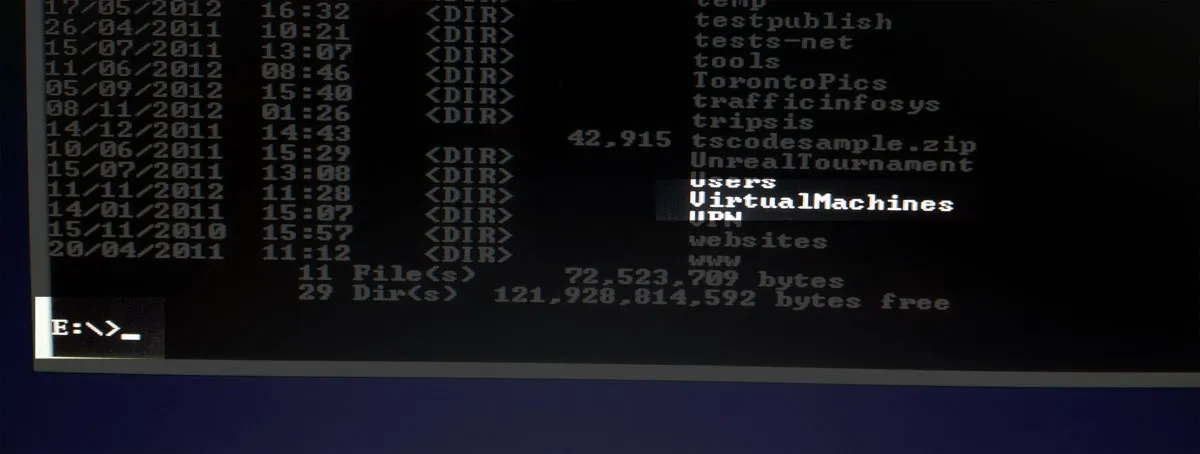
Your drive assignments may not match what you have within your existing installation, so you may need to have a look on a couple of drives to find your VHD.
To do this, change directory using
d:(or whatever drive you want to check) then list the contents using
dirJust go through the alphabet until you find your virtual disk. Mine was lurking on the E drive.
Start DISKPART, select and attach your disk (remember to change these commands to match what you have on your system):
DISKPART> select vdisk file=e:VirtualMachinesWin8.vhd
DISKPART> attach vdisk
When this has completed, you can Alt-Tab back to your installation devices menu. Hit Refresh and you should see your VHD attached.
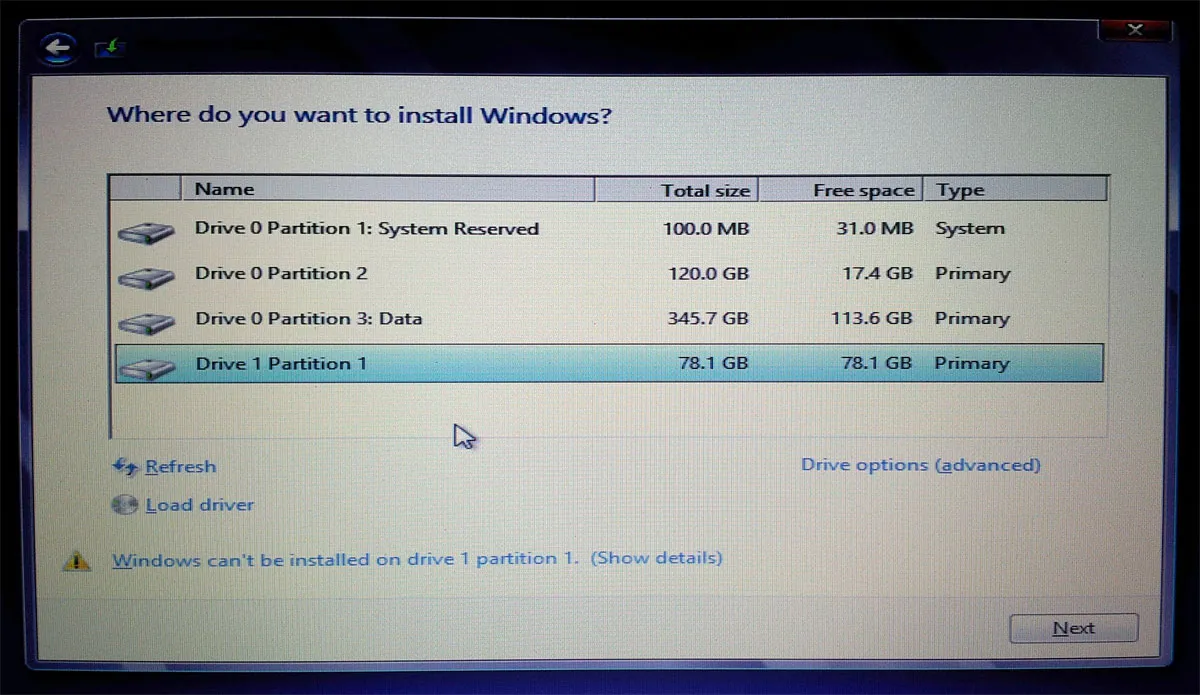
You’ll see an error message telling us we can’t install Windows to that drive. Just ignore that; it can.
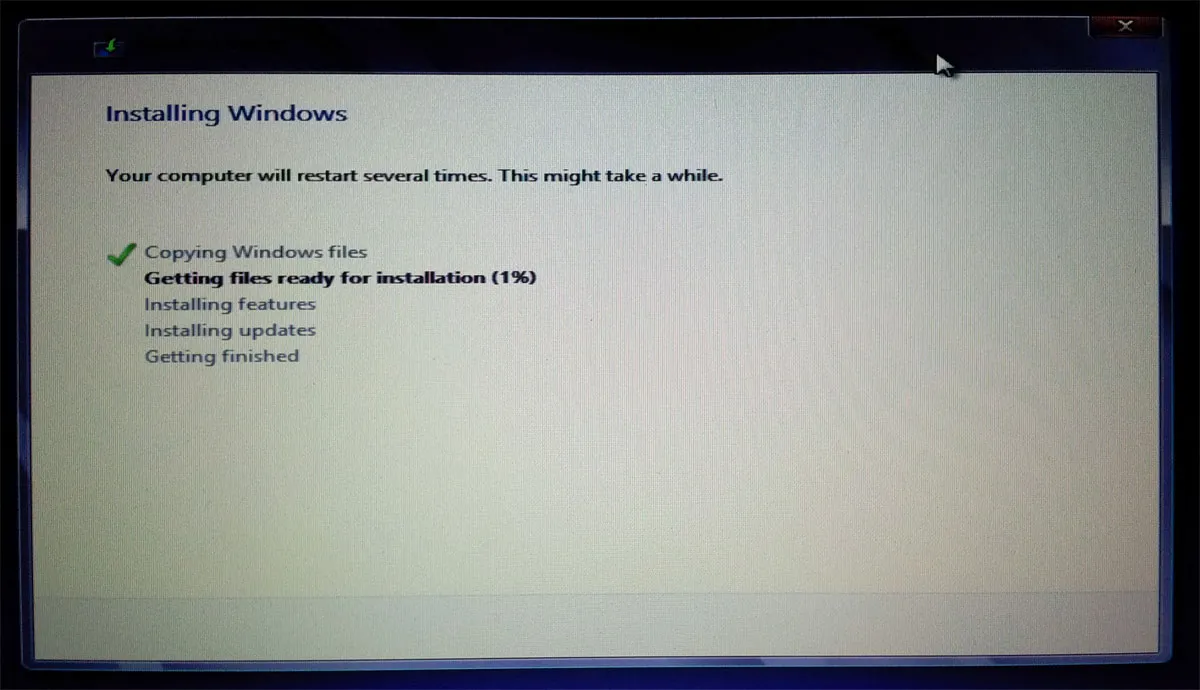
Select your blank VHD and click Next. The installer will do its thing and start installation.
After a while, your machine will restart and, if all’s gone to plan, you’ll get the (much improved) Windows 8 boot menu.
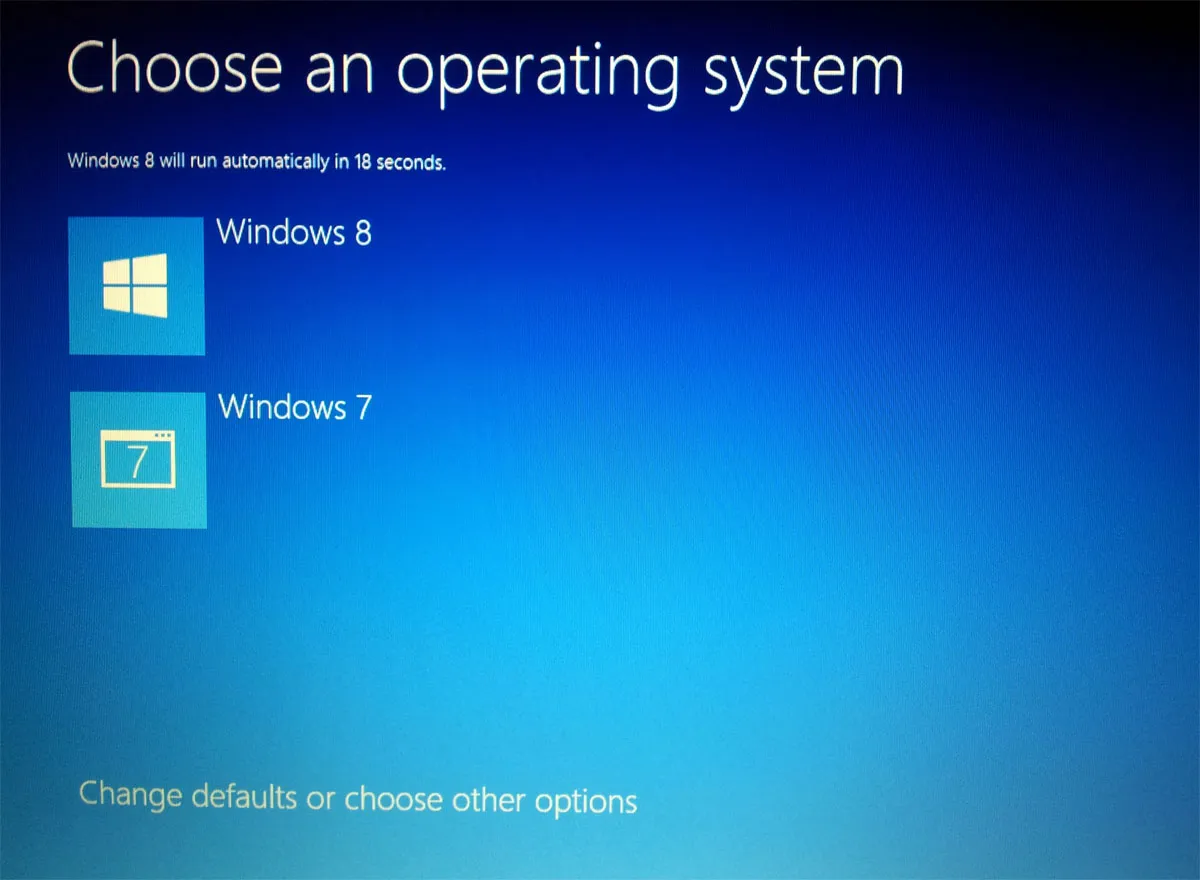
And that should be you. Windows 8 will eventually boot (after a good few minutes of ‘we’re getting your PC ready’ messages) and you can start playing around with the new tiled interface.