Create a Grunt meta-runner in TeamCity
As much as all the cool kids are now using Gulp, I’m still using Grunt for a few few automated tasks.
In our current project, we’re using it to compress all of our JS in the project, run the Jasmine tests through Karma, and generate test code coverage reports. As well as doing this locally, we need to be able to incorporate it in our build process on TeamCity.
It’s pretty straight-forward to set up but it can be made even easier using a meta-runner.
It’s all about the Meta, Meta, Meta
A Meta-Runner allows you to extract build steps, requirements and parameters from a build configuration and create a build runner out of them. This build runner can then be used as any other build runner in a build step of any other build configuration or template.
– Working With Meta Runner
Essentially, a meta-runner lets you fill in gaps in the TeamCity build runner library with custom tasks that you need.
For our use, this means setting up something to allow easy running of tasks through Grunt.
Let’s start by creating our Grunt file.
Grunt
module.exports = function (grunt) {
  grunt.initConfig({
    pkg: grunt.file.readJSON('package.json'),

    karma: {
      test: {
        configFile: 'karma.conf.js',
        singleRun: true,
        autoWatch: false,
        reporters: ['teamcity'],
      },
      coverage: {
        configFile: 'karma.conf.js',
        singleRun: true,
        autoWatch: false,
        reporters: ['coverage'],
      },
    },

    uglify: {
      options: {
        compress: {
          drop_console: true,
        },
      },
      all: {
        files: [
          {
            expand: true,
            cwd: 'app/',
            src: ['**/*.js', '!**/*_tests.js'],
            dest: 'app/',
          },
        ],
      },
    },
  });

  grunt.loadNpmTasks('grunt-karma');
  grunt.loadNpmTasks('grunt-contrib-uglify');

  grunt.registerTask('coverage', ['karma:coverage']);
  grunt.registerTask('compress', ['uglify']);
  grunt.registerTask('test', ['karma:test']);
};
In this file, we have three tasks:
- coverage
- uglify
- test
We want TeamCity to run these in order (coverage and test are done separately so we can generate coverage reports on the unminified code then run all unit tests on compressed code [after uglify]).
Making TeamCity Grunt
TeamCity doesn’t (at least as of v9) include a built-in runner for Grunt, but there’s a plugin available to add the required functionality. So grab that and install it.
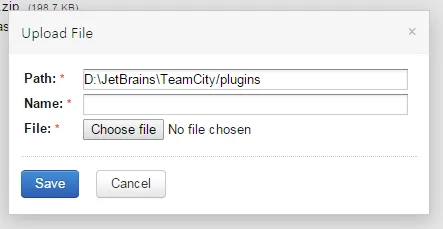
Once that’s installed, you’ll have a Grunt runner available in your build steps.
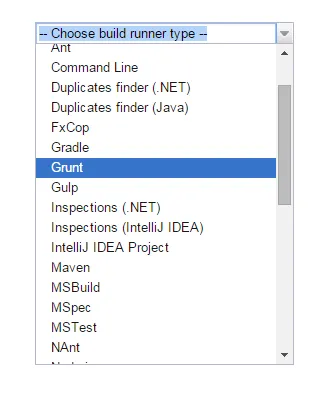
Set up the Build Task
You can manually create a meta-runner, but it’s easier to just create a build task and then generate the meta-runner from there.
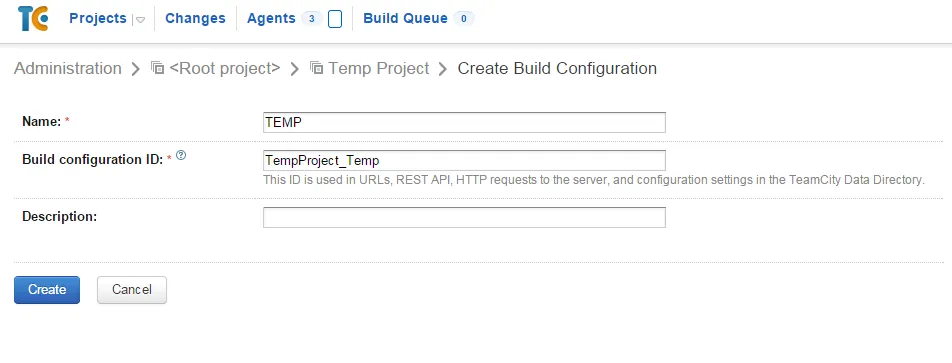
Create a temporary project in TeamCity to give us somewhere to define our task.
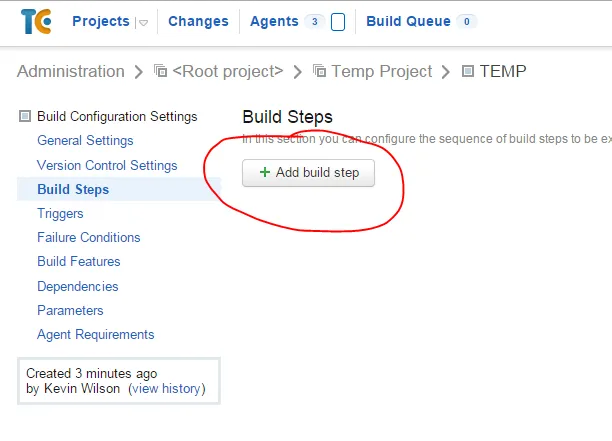
In build steps, open the dialogue to create a new one.
Select to add a Grunt task (as shown above) and enter the details specific to your project.
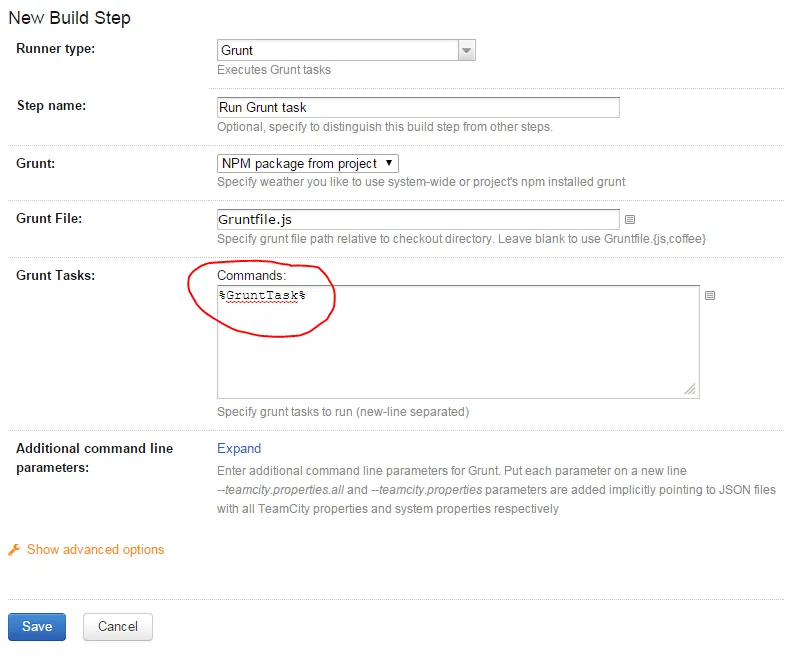
Since we’re going to extract this, enter a TeamCity config paramter as the Grunt task for now.
Extract the Runner
Now that we have our task set up, we can extract the meta-runner.
Select the Extract meta-runner option from the Actions menu.
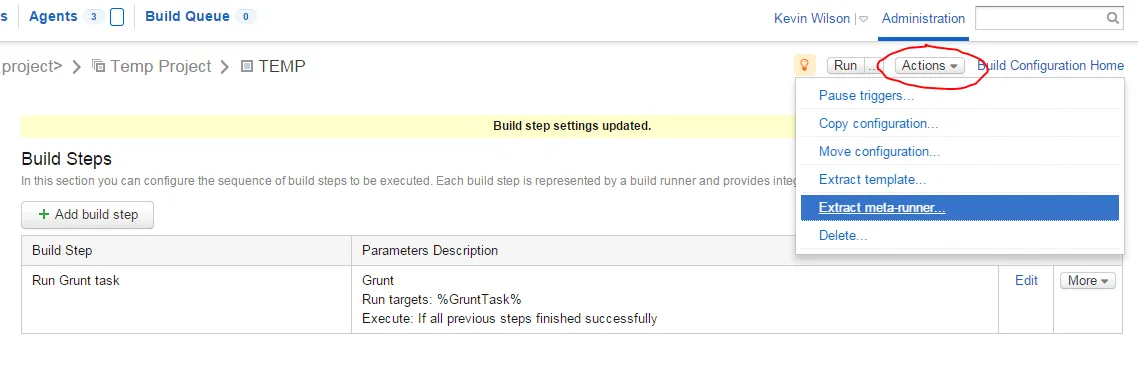
We can then enter some details about the task runner.
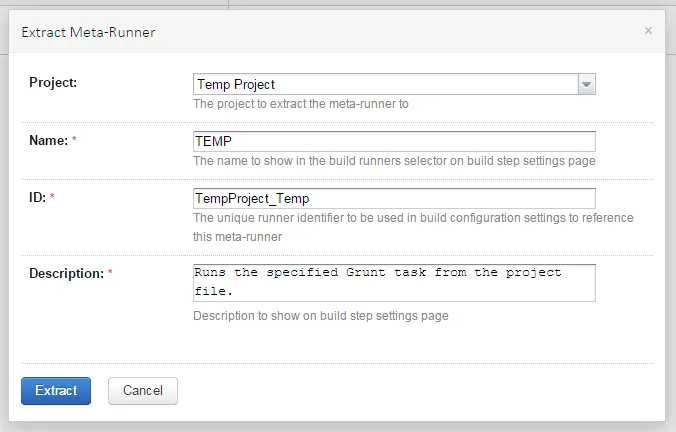
Click Extract and our meta-runner will be saved.

If we now click on Edit, we’ll see the XML definition of our runner. By default it’ll take the name of the project for the runner name. You can change this in the second line. We’ll name ours Gruntfile Runner. I noticed after I finished creating the screenshots that I could have edited the name when extracting the runner. So that’s your best option.
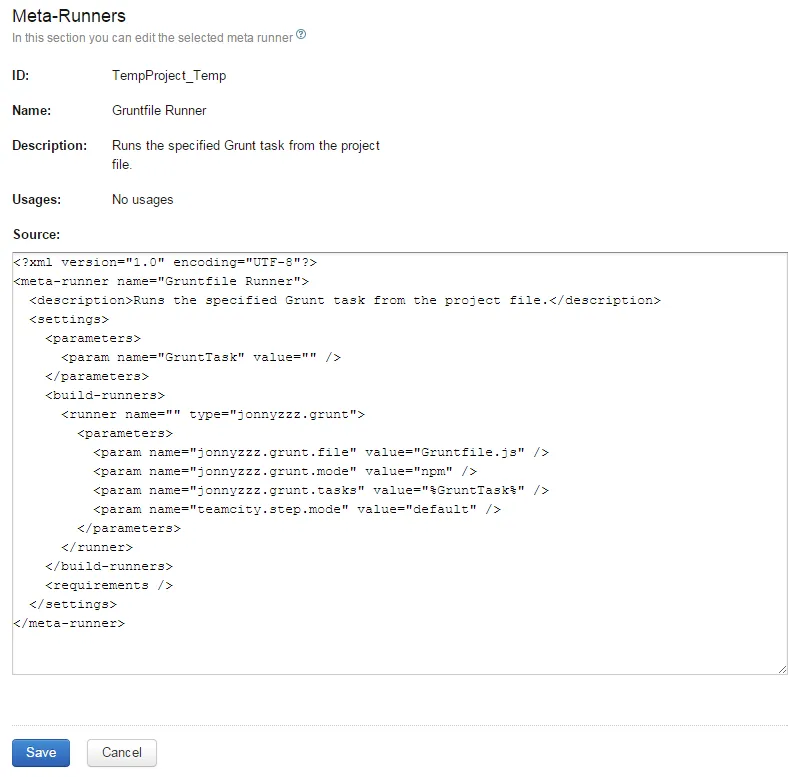
Runner Details
The XML for our runner looks like this:
<?xml version="1.0" encoding="UTF-8"?>
<meta-runner name="Gruntfile Runner">
  <description>Runs the specified Grunt task from the project file.</description>
  <settings>
  <parameters>
    <param name="GruntTask" value="" />
  </parameters>
  <build-runners>
    <runner name="" type="jonnyzzz.grunt">
    <parameters>
      <param name="jonnyzzz.grunt.file" value="Gruntfile.js" />
      <param name="jonnyzzz.grunt.mode" value="npm" />
      <param name="jonnyzzz.grunt.tasks" value="%GruntTask%" />
      <param name="teamcity.step.mode" value="default" />
    </parameters>
    </runner>
  </build-runners>
  <requirements />
  </settings>
</meta-runner>
On line 2, we’ve changed the name of the runner.
On line 6, we have the parameter that will be used when using our meta-runner as a build task. Anything we want to make configurable in your meta-runner, we can add here.
Running
Now that we have our meta-runner set up, let’s create a build using it.
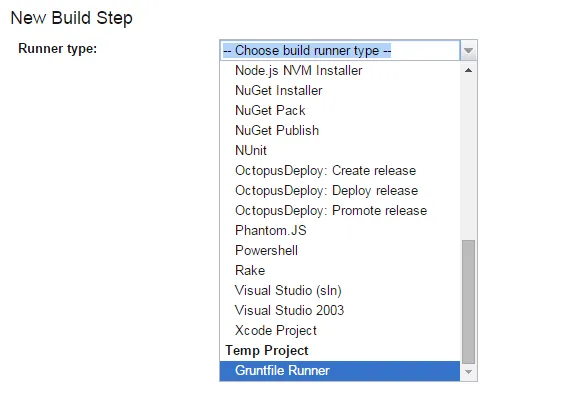
When we go in to our build definition and add a new build step, we now have our Gruntfile Runner as an option in our runner selection.
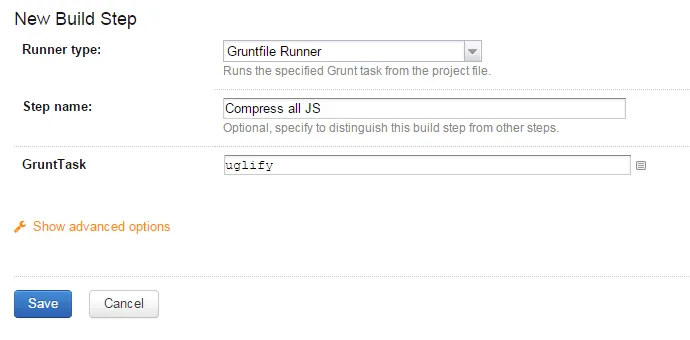
And we can quickly configure it to compress all of our JS:
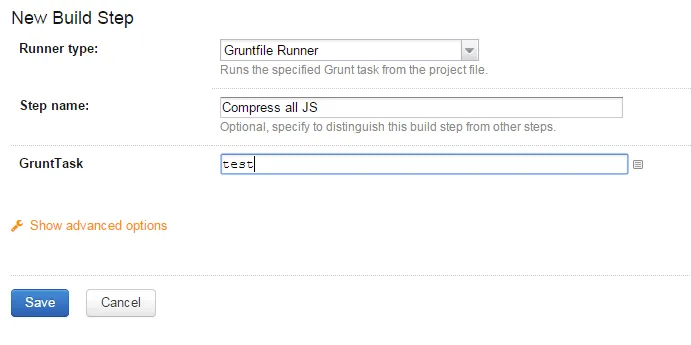
Or run our unit tests:
Going Further
This is obviously a very simple example of what you can do with meta-runners, but it gives you an idea of the process and should hopefully spark some ideas.
You can also have a look at all of the shared meta-runners in the Meta Runner Power Pack on GitHub.